Using RSelenium for task automation and web scraping

1. Introduction
This article aims to present the RSelenium package’s basic functionalities and show how it can help you to perform many useful daily tasks automatically in your internet browser. RSelenium also offers a great opportunity to observe object-oriented programming (OOP) fully implemented in R.
In order to use RSelenium, first you need to install it with the install.packages("RSelenium") command. Be carefull to write the first two letter as capital ones. Besides, the Java software needs to be installed in your machine too, or later you will face the following error: error in java_check () : PATH to JAVA not found. A very few functions from the tidyverse will also appear in our code, so install it with install.packages("tidyverse") if you haven’t yet. Also, the package getPass might be useful if we want to send sensitive login information in our code.
In our examples of browser manipulation, we used the version 91.0.4472.77 of Google Chrome in a Windows environment and R version 4.0.5. However, RSelenium can be used with other combinations of internet browser and operational system. Check out the RSelenium official documentation page for more information about these topics.
The following images in this article are all mines, except the few times when the webpages https://quotes.toscrape.com/ and http://httpbin.org/forms/post (two popular sites for webscraping exercises) or their HTML code are reproduced here. I used an R Jupyter Notebook during development but the code can be run in RStudio for sure too. You will find both a Jupyter Notebook and an R script with the complete code on my Github repository.
For people who might be interested in learning Selenium for Python, there is another notebook on the same Github repository with the code translated to this programming language.
2. Importing packages and writing a helper function
Let’s start by importing the libraries to be used in our code.
# Import libraries
library("RSelenium")
library("tidyverse")
library("getPass")

# This line makes R show messages in English.
# Use "pt" if you want them to be displayed in Portuguese
Sys.setenv("LANG" = "en")
I also created a customized function called check_object that will print the class and typeof functions info, which will help us to analyze the new RSelenium objects we will find on our way.
# Customized function to check class() and typeof() at once:
check_object <- function(object) {
    cat("\nclass: ",
        class(object),
        "\ntypeof: ",
        typeof(object),
        "\n")
}
3. First RSelenium objects: rsClientServer and remoteDriver
The next step is to create an RSelenium rsClientServer, which we will save in the computational variable called client_server. The code below will automatically open a new Chrome window and give us more information about the object we have just created.
# Create rsClientServer object with Google Chrome browser.
# Change the chromever argument for the Chrome version used in your machine
client_server <- RSelenium::rsDriver(browser=c("chrome"),
                                     chromever="91.0.4472.101",
                                     port=4545L,
                                     verbose=F)
check_object(client_server)
Note that I passed a specific Chrome version as a string in the chromever argument. So, you will need to adjust it according to your reality. Some arguments in RSelenium::rsDriver() use "latest" as default value, which can cause errors if an installed version from Selenium or the chosen browser is different from the latest available version, even if it is a beta one. I experienced that issue with Chrome while finishing this article and I want you to be prepared if you wind up facing a similar obstacle.
Now it is time to save the RSelenium remoteDriver into the computational variable called driver. This object is by far the most important one in our code. As we will discover later, we will spend most of the time calling methods from the remoteDriver object to manipulate the browser and get the information we need.
# Save the remoteDriver object in the computational variable called "driver"
driver <- client_server[["client"]]
check_object(driver)
4. Navigate to a new webpage
We will start by telling the remote driver to open the site https://quotes.toscrape.com/. One can do that by calling the navigate() method from the remoteDriver object and using the URL as the method argument:
# Navigate to the page to be scraped
url <- "https://quotes.toscrape.com/"
driver$navigate(url)
After running this code, the Chrome window controlled by RSelenium will open the chosen site.

Whenever you need your code to return the current webpage URL, you can call driver$getCurrentUrl(). And if you want to work with a maximized browser window, just call driver$maxWindowSize().
# Get the current url
driver$getCurrentUrl()

# Maximize window
driver$maxWindowSize()
Here I would like to make a very important observation: the browser window controlled by RSelenium will close automatically if there is no new activity for a while. If that happens, you will probably have to run the code below in order to free the port you last used in your RSelenium program. I found this line of code on StackOverflow after facing this problem for the first fime and now I use it whenever I run into such an issue.
# This line is very important: run it if your Selenium
# remoteDriver crashes and you can't open another one in the same port

system("taskkill /im java.exe /f", intern=FALSE, ignore.stdout=FALSE)
5. The driver$findElement() method
The first element to be manipulated will be the login link, located in the webpage upper right corner. We will do that later by calling the driver$findElement() method with its two arguments (using and value).
However, since this method is so important, let’s take a quick look at all options available to the using parameter. Running driver$findElement, without the parentheses, will return information about this method. Please note that only the first lines from the output are reproduced below.
driver$findElement
As we can observe from the last reproduced output, the using parameter accepts one of the following strings:
"xpath"=> find the element in the page by using the Xpath query language;"css selector"=> use a selector from the CSS style sheet language to find the element;"id"|"name"|"class name"=> these three options use respectively the id attribute, the name attribute, and the class attribute from the HTML tags to find an element in the webpage;"link text"|"partial link text"=> when you deal with an HTML anchor tag (example:<a>this is the link text</a>), you can find them by searching for either the partial or the complete link text.
6. Working with an RSelenium webElement
So, let’s use the Xpath to find the login link element. One can do that on Chrome by right-clicking on the login link and then choosing the inspect option. This will open the DOM panel and show its HTML code.

Now, in your browser, right-click on the HTML <a> login element (the line highlighted in blue in the image above) and then choose “Copy” and “Copy full Xpath” in the auxiliary menu. Paste the Xpath information into a string and use it inside driver$findElement(), as follow:
# Get the login link element by using xpath
login_xpath <- "/html/body/div/div[1]/div[2]/p/a"
login_link <- driver$findElement(using = "xpath", value = login_xpath)
check_object(login_link)
As one can observe, the method driver$findElement() returns an RSelenium webElement object. When saved in a computational variable like login_link, this webElement can be used to call other methods too, as shown below:
# This method returns the element tag name
login_link$getElementTagName()

# This method returns the element inner text
login_link$getElementText()

# This method returns an element attribute (in this case, "href")
login_link$getElementAttribute("href")
You can also click on a webElement. In the current example, this will send us to the login page.
# Click on the element
login_link$clickElement()
7. Make your code take a little break with Sys.sleep()
We will manipulate this login page later. By now, let’s run the following code so that we can go back to the main page and wait for 2.5 seconds. Then we return to the login page and wait for another 2 seconds:
# Go back to the last page and wait 2.5 seconds
driver$goBack()
Sys.sleep(2.5)
cat("ok")
# Go forward in the browser history and wait 2 seconds
driver$goForward()
Sys.sleep(2)
cat("ok")When we work with RSelenium, asking the program to wait a couple of seconds before moving to a new page is an excellent strategy. Actually, this additional time before moving on is almost a mandatory strategy in order to avoid errors that can crash the code.
For example, if we go to a new page and ask RSelenium to find an HTML element that has not been loaded yet, we will get a NoSuchElement Error. And if that happens during a long loop and a lot of data has already been scraped, all the effort done by then might get lost. Thus, waiting a few seconds is a more preferable approach. You could also use try() and tryCatch() statements so that your code can be prepared for some of the most common errors before they occur.
8. Write a function to go back to the first page
If we were to click on the Quotes to Scrape link, the browser goes back to the first page. The image below shows this link HTML code:

Let’s find this link now with RSelenium by using the following CSS selector:
# This code uses a css selector to get the link to the main page
css_selector <- "div.header-box.row > div.col-md-8 > h1 > a"
main_page_link <- driver$findElement("css selector", css_selector)
check_object(main_page_link)
In CSS, class attributes are represented by a dot, and id attributes are represented by a hashtag symbol. The css_selector string we reproduced above can be read as follow: “find the first div HTML tag that has both the header-box and row classes, then find a div with the col-md-8 class inside it. Next, find a h1 heading, and then return the first link element inside it”.
We can get some info from this new element and click on it too so that the browser goes to the first page.
# Get the element info
main_page_link$getElementTagName()
main_page_link$getElementText()
main_page_link$getElementAttribute("style")

# Click on the link
main_page_link$clickElement()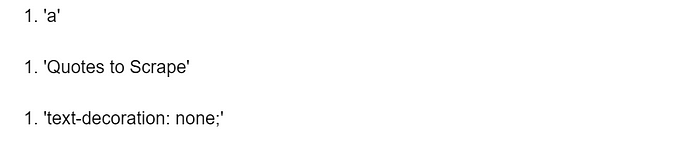
Now we are ready to write our first customized function using RSelenium code, which will be helpful whenever we want to go back to the first page in this website. Note here the phenomenon of method-chaining (a method called right after another method), which is a very common practice when working with OOP. This new function of ours will not return a webElement object, since the last action it performs is to click on the link. So, the function will return NULL because that is the value returned by the clickElement() method.
# This function makes the browser return to the main page
return_to_main_page <- function() {
    css_selector <- "div.header-box.row > div.col-md-8 > h1 > a"
    driver$findElement("css selector", css_selector)$clickElement()
}
9. Gather all links in a webpage with driver$findElements()
Our next action will be to scrape all links in the first page. This can be done by the findElements() method (note the additional letter s in the end). While findElement() (singular) returns the first webElement object in the DOM to match the search criteria, findElements() (plural) returns a list with ALL webElements objects with given criteria. findElements() will also demand the same using and value parameters we talked about earlier. If no webElement is found with the arguments passed to findElements(), an empty list will be returned by it.
If we perform a search using only the <a> tag name, we will find 55 links in the first page.
# The method findElements() returns a list of Web Elements.
# This code finds all links in page 1 by using the tag name
return_to_main_page()

all_links_page_1 <- driver$findElements("tag name", "a")

cat(paste("number of links in main page: ",
          length(all_links_page_1),
          "\n\n")
   )

cat("object", quote(all_links_page_1), "\n")
check_object(all_links_page_1)

cat("\n\nseventh object in", quote(all_links_page_1), "list:\n")
check_object(all_links_page_1[[7]])
We can choose to print to the console the inner text and URL from all the link elements in the first page. In order to do that, let’s first create another function.
# The function below, when used in a webElement with the "a" tag name,
# returns the link inner text and its url.
# Both info are also printed on the console if print_output = TRUE
show_links_info <- function(link_element, print_output = TRUE) {
    text <- as.character(link_element$getElementText())
    url <- as.character(link_element$getElementAttribute("href"))
    if (print_output) {
        cat(paste0(text, ": "),
            url,
            "\n")
        # line below makes the info be displayed during iteration
        flush.console()
    }

    c(text, url)
}
This new function must receive an RSelenium webElement with an HTML <a> tag, since we will look for its inner text and href attibute. So, if the print_output parameter is set to TRUE, the code inside the if statement is executed and the element inner text and URL will be printed to the console gradually, since flush.console() is called there. A vector with text and urlis returned by the function.
The code below with lapply will print all the information from the all_links_page_1 list. The computational variable saved_list allows to access this info in a list of lists too, if necessary. Only part of the output is reproduced below:
# Use lapply to apply the show_links_info function to the list with
# all the links in the first page
saved_list <- lapply(all_links_page_1, show_links_info)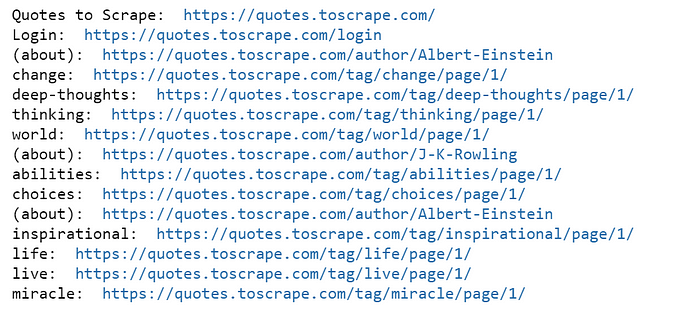
If we prefer to save the links information into a data frame, that can be done by a for loop, with each iteration calling show_links_info() and appending this info to a new computational variable called links_dataframe.
# The code below saves all links from page 1 in a dataframe

links_dataframe <- data.frame()

for (i in 1:length(all_links_page_1)) {
    links_info <- show_links_info(all_links_page_1[[i]], print = FALSE)
    temp_data_frame <- data.frame(index = nrow(links_dataframe) + 1,
                                  text = stringr::str_trim(links_info[1]),
                                  url = links_info[2])
    links_dataframe <- rbind(links_dataframe, temp_data_frame)
10. Go through all pages in a website
Another very common task we might need to perform is to visit all pages in a website by following a next link, for example. And in each page, we can perform an action, like scraping some information.
Since we cannot be sure of how many pages a site has beforehand, we need code that keeps repeating an action until a condition becomes true and the code stops executing. That is right, this is a perfect scenario to use a repeat loop with a break inside an if statement. At first, this loop of ours will only go through every page and then print the page number to the console.
# This code clicks on the "next" link and moves along the pages.
# When the last page is reached and there is no next link, break the loop.
return_to_main_page()
i <- 1

repeat {
    cat("\npage ", i)
    flush.console()
    i <- i + 1

    next_link_as_list <- driver$findElements(using="css selector", "li.next > a")

    if (length(next_link_as_list) == 0) {
        break
    }

    next_link_as_list[[1]]$clickElement()
    Sys.sleep(2)


}

cat("\nwe reached the last page")
return_to_main_page()
cat("\nback to page 1\n")
Note that the next link is located by using driver$findElements() in line 11. So, this code will return either a list with one webElement or a list with no element at all. This is a nice way of avoiding the NoSuchElement Error that would have been raised in the last page if we had used the driver$findElement() method instead. So, when next_link_as_list has a length of zero, the code will enter the conditional and break the loop, and we will have accomplished our goal of going through all pages in the website.
11. Writing code to open a specific page in the website
After the last code execution, we discovered that the site has only 10 pages with quotes. Besides, all pages from 2 to 10 share the following url pattern: https://quotes.toscrape.com/page/ plus the page number added to its end. This kind of situation is a very desirable one because it allows you to move to new pages by just sending the specific url pattern directly to the driver$navigate() method. So, if you know all the pages range beforehand, this approach will be much easier than finding link elements and clicking on them to change pages.
Let’s now create a function that will send us directly to a chosen page in our website. We will add some boolean conditions in it so that the function can check the argument class and raise an exception if it is a character one. The function will also truncate decimal numbers and raise an error if the number passed to it is not between 1 to 10.
# From the code above, we discovered that there are 10 pages in the website.
# The function below goes to a chosen page and it will raise an error
# if the argument passed is not an integer number between 1 and 10
go_to_page <- function(page_number=1) {
    if (is.character(page_number)) {
        cat("Error: you passed a string as argument.")
    }

    if (!is.numeric(page_number) ||
        as.integer(page_number) < 1 ||
        as.integer(page_number) > 10 ) {
        stop("Provide an integer number between 1 and 10 as argument")
    }

    if (page_number %% 1 != 0) {
        page_number <- trunc(page_number)
        cat(quote(page_number), "truncated to", page_number)
    }

    if (page_number != 1) {
        base_url_page <- "https://quotes.toscrape.com/page/"
        driver$navigate(paste(base_url_page, as.character(page_number), sep=""))
    } else {
        return_to_main_page()
    }
}
Now, we can go to page 3 and page 7 directly by running this code:
# Go to page 3, wait 2.5 seconds and then go to page 7
go_to_page(3)
driver$getCurrentUrl()

Sys.sleep(2.5)

go_to_page(7)
driver$getCurrentUrl()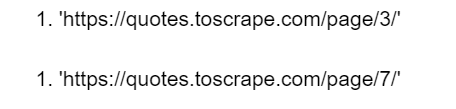
If we ask to go to page pi by mistake instead of page 3, the function will let us know that it used a truncated version of pi, leading us then to page 3.
# This code truncates 3.14 to 3 and then go to page 3
go_to_page(pi)
Sys.sleep(2.5)
driver$getCurrentUrl()
And any of the following function calls will return an error:
# The following function calls will return errors

go_to_page("page number 3")
go_to_page("3")
go_to_page("3.1415")
go_to_page(25)
go_to_page(97.75)
And what if we wanted to retrieve an information from the current URL and save it in a computational variable, like the current page number, for example? The following code will transform the current URL in a string, split it by the / characters and save this info in a list of strings. Then it will get the last element of this list, which will be the page number for any page but the first one.
# The code below will extract the page number from the current url
go_to_page(10)

my_url <- as.character(driver$getCurrentUrl())
cat(my_url, "\n")

split <- base::strsplit(my_url, "/")
cat(unlist(split)[length(unlist(split))])

return_to_main_page()
12. Saving the quotes info as strings
Now, it is time for us to tackle the main information in the website: the quotes. Before we can save them all in a nice data frame (R programmers do like saving info in data frames, don’t they?), I will show you a way of accessing all the quotes text information at once. Below we reproduce the HTML structure from one of these quotes (the vertical blue line marks all children tags inside a quote box):

When we use the getElementText() method from a webElement object, we not only access its own inner text but also the inner texts from all its children tags. So, if each quote info is inside a div tag with a quote class, represented in CSS selector by div.quote, we can print all quotes information from page 1 by running the following code (output is only parcially reproduced below):
# This code reproduces all the first ten quotes as a long string.
# It shows how you can use the getElementText() method to access the
# inner text from all children elements at once.
string <- ""
quotes_divs_list <- driver$findElements("css selector", "div.quote")
string <- unlist(lapply(quotes_divs_list, function(element) {
    string <- paste(string,
                    as.character(element$getElementText()),
                    "\n\n",
                    sep="")
    return(string)
}))

cat(string)
13. Saving the quotes info as a data frame
In our effort to save the quotes information into a data frame, let’s first create the following auxiliary functions:
# Customized functions to be used in the next sapply() and lapply() calls in this code:
get_element_text <- function(element) {
    as.character(element$getElementText())
}

get_link_href <- function(element) {
    as.character(element$getElementAttribute("href"))
}

click_element <- function(element) {
    element$clickElement()
}
If we run the code below, we can get all quotes info in the first page and save them to computational variables:
# With this code one can get all the info for the quotes in the current page
return_to_main_page()
quotes_text <- sapply(driver$findElements("css selector", "span.text"),
                      get_element_text)
authors_text <- sapply(driver$findElements("css selector", "small.author"),
                       get_element_text)
authors_links <- sapply(driver$findElements("partial link text", "(about)"),
                        get_link_href)
tags_text <- sapply(driver$findElements("css selector", "div.tags"),
                    get_element_text)
These three functions we created will be used to get the quotes information from each page (like we did for page 1) and save it in vectors that will eventually be appended to the all_quotes data frame. Notice that we will also loop over the pages using the repeat structure we built before, even though we use a while (TRUE) loop here instead.
# Now, we only need to loop over all pages and save the quotes info into a dataframe
return_to_main_page()
all_quotes <- data.frame()
i <- 0

while (TRUE) {
    quotes_texts <- sapply(driver$findElements("css selector", "span.text"),
                           get_element_text)
    authors_texts <- sapply(driver$findElements("css selector", "small.author"),
                            get_element_text)
    authors_links <- sapply(driver$findElements("partial link text", "(about)"),
                            get_link_href)
    tags_texts <- sapply(driver$findElements("css selector", "div.tags"),
                         get_element_text)
    page_quotes <- data.frame("sequence" = (i * 10 + 1):(i * 10 +10),
                              "quote" = quotes_texts,
                              "author" = authors_texts,
                              "author_biography_link" = authors_links,
                              "tags" = tags_texts)

    all_quotes <- rbind(all_quotes, page_quotes)
    i <- i + 1
    cat("\npage", i)
    flush.console()

    try(next_link_as_list <- driver$findElements(using="css selector", "li.next > a"),
        silent = TRUE)

    if (length(next_link_as_list) == 0) {
        break
    }

    next_link_as_list[[1]]$clickElement()
    Sys.sleep(2)

}
If we want, we can save the all_quotes data frame as a CSV file, check the data frame dimensions and look at its first rows.
# save the all_quots dataframe as a CSV file
write.csv(all_quotes,
          file = "quotes.csv",
          quote = FALSE,
          row.names = FALSE,
          fileEncoding = "UTF-8")

cat(paste0("all_quote data frame dimensions: ", nrow(all_quotes), ", ", ncol(all_quotes)))

head(all_quotes, 3)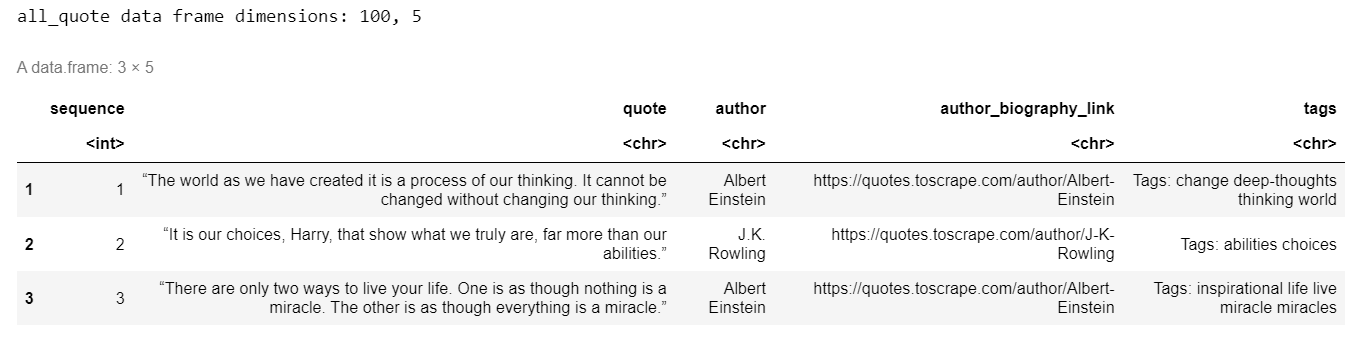
Pretty amazing, right?
14. Saving the authors’ biographical info as a data frame
However, there are still some interesting information in this website waiting to be scraped by us. If you navigate to the first link in the statistical variable all_quotes$author_biography_link, you will find biographical information about Albert Einstein. Every author quoted in the website has a page like that. The good news is that we already gathered all these biographical links, we only need to loop over them and save the scraped information into another data frame called authors_info. The following code accomplishes that task.
# Each author has a biography page. We can get that info too.
# This will get all the unique authors biography links
unique_links_biographies <- unique(all_quotes$author_biography_link)
cat("total of biographical pages:", length(unique_links_biographies))

# Now we can loop over these biography links and save their info in a dataframe
authors_info <- data.frame()

for (link in unique_links_biographies) {
    driver$navigate(link)
    Sys.sleep(3)
    index <- nrow(authors_info) + 1
    name <- driver$findElement("css selector", "h3.author-title")$getElementText()
    born_date <- driver$findElement("css selector", "span.author-born-date")$getElementText()
    born_location <- driver$findElement("css selector", "span.author-born-location")$getElementText()
    description <- driver$findElement("css selector", "div.author-description")$getElementText()

    cat("\n", index, "of", length(unique_links_biographies))
    flush.console()

    new_row <- data.frame("index" = index,
                          "name" = as.character(name),
                          "born_date" = as.character(born_date),
                          "born_location" = as.character(born_location),
                          "description" = as.character(description))

    authors_info <- rbind(authors_info, new_row)
}

head(authors_info)
After we loop over all the 50 biographical pages, we will have a new nice data frame with all this information and we can saved it in a new CSV file, for example. Notice that this program logic can be reused and applied to many web scraping tasks. Find the data you need, make sure to follow the website robots.txt instructions and be happy!
15. Manipulate text input boxes in the login page
Now it is time for us to start manipulating form elements, which is a very important skill to add to our task automation kit. Let’s go back to the login page and save the two text input boxes into computational variables.
# Now we go to the login page and play a little with the text input boxes.

# Go to the login page
login_xpath <- "/html/body/div/div[1]/div[2]/p/a"
driver$findElement(using = "xpath", value = login_xpath)$clickElement()

# Save the text input boxes elements in variables, using their id (two forms):
username_input <- driver$findElement("id", "username")
password_input <- driver$findElement("css selector", "#password")
When handling text input HTML elements, two methods are definitely very useful: clearElement() and sendKeysToElement(). It is a good idea to start by calling the former so that any previous content might get cleared before you start sending new information to the text box. As for the second method, it receives a list with a string as its sole element.
# Username and password values
# (one can also use base::readline() or getPass::getPass()
# to ask for user input)
username <- "Fabrício"
password <- "1234 is not a secure password!"

# When dealing with input boxes, it is good practice to clear their value first
username_input$clearElement()

# Send the username information (it needs to be passed as a list)
username_input$sendKeysToElement(list(username))

# Do the same with password
password_input$clearElement()
password_input$sendKeysToElement(list(password))

# Once you don't need the username and password variables anymore, delete them
rm(username, password)
In order to submit the form and login in the site, we still need to press the login button. We can do that by using the submitElement(), available for some HTML elements that have the ability of submiting information to the website.
# Find the submit button
submit_button <- driver$findElement("css selector", "input.btn.btn-primary")

# Use the submitElement() method to submit the form information
submit_button$submitElement()
After we do that, nothing extraordinary will happen: we will be redirected to the first page and the login text will be changed to Logout. But we did perform some fancy activity: we wrote code to login automatically in a website. If we desire, we could do the same operation in many other sites.
Just be careful about letting important information, like passwords, hard-coded in your program. Don’t make the life of bad people who can steal your personal info too easy, ok? A very good option to avoid such problems is to use the getPass package to send sensitive input data.
16. Working with other types of HTML input tags
Even though they are found on the internet very often, textboxes are not the only HTML input we can manipulate with RSelenium code in our browser. We will move now to a new website (http://httpbin.org/forms/post) and automate the boring task of ordering pizza online. Because eating pizza is a lot of fun but ordering it… well, not that much. We can let our R program to do the ordering for us so that we can focus only on the eating, fun part.
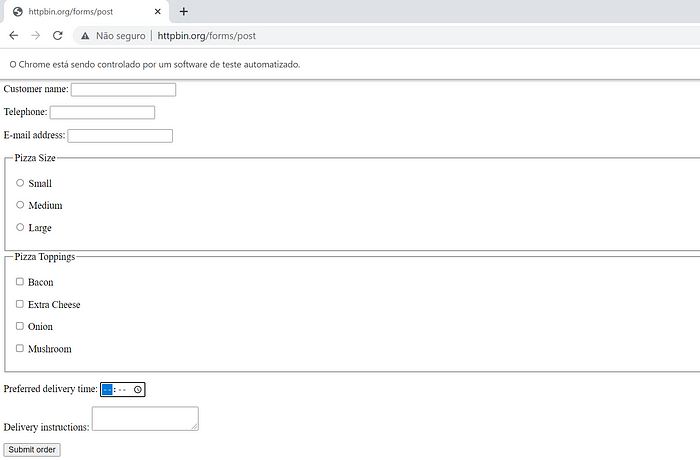
As we can observe, besides three text boxes, this form uses radio buttons for the pizza size, checkboxes for the toppings, and a time input for the delivery time. These four elements are all input HTML tags, but they differ in their type attribute value. And depending on the chosen input type, they can have very specific HTML attributes that are not present in the others ones. We also have a textarea tag used in the delivery instructions, and a submit button to the form.
So, I want a large pizza with bacon, extra cheese and mushrooms to be delivered around 19:45 at my home. I just need to let my code to do the ordering for me.
Below you will find my answer to this challenge. However, before you check it out, see if you can imagine how this code would look like. And to make it more interesting, use a one liner to order the three toppings at once with the help of the base::lapply() and the click_element() functions (this last one was created by us earlier).
Another quick tip: radioboxes and checkboxes can be manipulated using the $clickElement() method.
My code to perform this task goes below:
# This code choose the large option in the radio buttons
radio_buttons <- driver$findElements("css selector", 'input[type="radio"]')
radio_buttons[[3]]$clickElement()

# Choose the first, second and fourth toppings to your pizza
checkboxes <- driver$findElements("css selector", 'input[name="topping"]')
lapply(checkboxes[-3], click_element)

# Set delivery time to 19h45
time <- driver$findElement("css selector", 'input[type="time"]')
time$sendKeysToElement(list("19:45"))

poetry <- "
Two households, both alike in dignity\n
(In fair Verona, where we lay our scene),\n
From ancient grudge break to new mutiny,\n
Where civil blood makes civil hands unclean.\n
From forth the fatal loins of these two foes\n
A pair of star-crossed lovers take their life;\n
Whose misadventured piteous overthrows\n
Doth with their death bury their parents’ strife.\n
The fearful passage of their death-marked love\n
And the continuance of their parents’ rage,\n
Which, but their children’s end, naught could remove,\n
Is now the two hours’ traffic of our stage;\n
The which, if you with patient ears attend,\n
What here shall miss, our toil shall strive to mend.\n"

# Send aditional information to the textarea input
textarea <- driver$findElement("tag name", "textarea")
textarea$sendKeysToElement(list(poetry))

# Submit form and go back
driver$findElement("css selector", "p > button")$submitElement()
Sys.sleep(5)
driver$goBack()

# Refresh the form page:
driver$refresh()
17. Finishing your work with RSelenium
Finally, we can ask RSelenium to close the browser window and shut down the server. We should also release the port we were using.
# When you are done working with selenium,
# Quit the browser and end the session
driver$quit()
driver$closeServer()
rm(driver, client_server)

# This releases the port.
system("taskkill /im java.exe /f", intern=FALSE, ignore.stdout=FALSE)
18. Last words
Now, we could create code to order 20 diferent pizzas, for example, if we desired to make a good surprise for our great work colleages. Then, whenever you want to ask another 20 pizzas (or 15, or 1000!), you just need to hit the run button, and RSelenium makes all the work for you.
That’s the beauty of task automation, and with this tutorial, we only scratched the surface of what RSelenium can do for us. However, the information published here is more than enough to allow you to continue your learning path in this area and create fantastic scripts that will save you and your team a lot of time.
And this saved time can be applied later in other important activities, like spending quality time with family or friends, reading, learning new skills, birdwatching, or simply relaxing. You definitely earned it after writing your automation script!
Good luck and happy automation!
P.S.: You will find more info about my work on LinkedIn, Medium, and Github:
https://www.linkedin.com/in/fabriciobrasil
https://fabriciusbr.medium.com/
Link do post original: https://fabriciusbr.medium.com/using-rselenium-for-task-automation-and-web-scraping-250c4f2f5979
#coletadadedadosdaweb #linguagemR #automacao
- Categoria(s): ciencia de dados Fabrício Barbacena Linguagens de programação